Ubuntu 12.10 Quantal Quetzal is here already. A lot of new features has been added, but overall performance remains a major cause of concern. Feedback from our readers also point to such a direction. You can find a number of interesting reactions from users in our previous post discussing Ubuntu and Project Butter. Meanwhile, lets find out what all can be done to make the latest Ubuntu 12.10 fast and usable as it should have been in the first place. 20 things to do after installing Ubuntu 12.10 Quantal Quetzal.
20 Things to do After Installing Ubuntu 12.10 Quantal Quetzal
I like Ubuntu. There is no other way around it. I have been using Ubuntu since "Feisty Fawn" and no matter how many different OSes I try, Ubuntu remains my default choice of them all. I like Unity too, even with all the nagging performance issues that have slowly crept in. But there are certain things you could do to make your Ubuntu even better, faster and usable. Let's take a quick tour of new Ubuntu 12.10 and explore the things I did after installing Ubuntu 12.10 Quantal Quetzal. I have tried to sqeeze in some performance related improvements as well.
Note: This post (screenshots included) is heavily adapted from our previous article describing things you could do after installing Ubuntu 12.04 LTS.
Basic Stuff - Installing Ubuntu Restricted Extras During Installation
Update Repositories
20 Things to do After Installing Ubuntu 12.10 Quantal Quetzal
I like Ubuntu. There is no other way around it. I have been using Ubuntu since "Feisty Fawn" and no matter how many different OSes I try, Ubuntu remains my default choice of them all. I like Unity too, even with all the nagging performance issues that have slowly crept in. But there are certain things you could do to make your Ubuntu even better, faster and usable. Let's take a quick tour of new Ubuntu 12.10 and explore the things I did after installing Ubuntu 12.10 Quantal Quetzal. I have tried to sqeeze in some performance related improvements as well.
Note: This post (screenshots included) is heavily adapted from our previous article describing things you could do after installing Ubuntu 12.04 LTS.
Basic Stuff - Installing Ubuntu Restricted Extras During Installation
- Starting from Ubuntu 11.04 release, you can install restricted codecs package (which include Adobe Flash, MP3 codecs and such) during installation of Ubuntu OS itself.
- Notice the arrows pointing to the boxes in the screenshot above. If you tick both of them during the Ubuntu installation process (make sure you are connected to the internet before doing so), restricted extras package will be installed automatically and you will be able to play mp3's, avi's, mp4's etc. and watch flash videos (YouTube videos for example) right after Ubuntu installation is done with.
- But there is a catch. If you have a slow internet connection (which is very rare these days), ticking the boxes shown in the screenshot above will unnecessarily lengthen the installation process. I for one prefer to do all that after installing Ubuntu. If you are like me, the next two steps are for you.
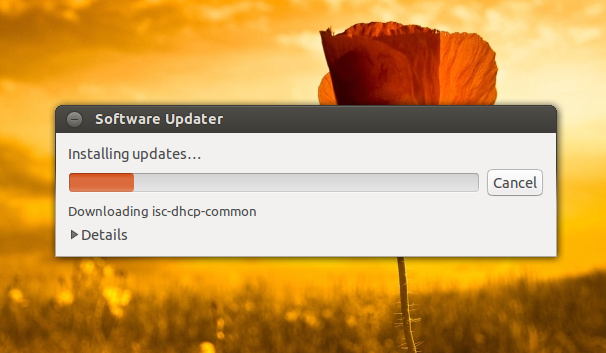
- After you install brand new Ubuntu 12.10, the first thing you need to do is to update repositories and make sure you have the latest updates installed.
- Search for Software Updater in Unity Dash and launch the Software Updater app. It will automatically check for updates available. Install the updates.
- OR you can do this entirely using command line. Open Terminal (Ubuntu 12.10 Keyboard Shortcut: Ctrl + Alt + T) and copy-paste the following command into Terminal.
sudo apt-get update && sudo apt-get upgrade
- Done. Ubuntu repositories have been successfully updated.
- Install the "ubuntu-restricted-extras" package. This will enable your Ubuntu to play popular file formats like mp3, avi, flash videos etc. CLICK HERE (to install directly from Ubuntu Software Center) OR simply copy-paste the following command into Terminal to install the package (You need not do this if you have ticked the 'right' boxes before).
sudo apt-get install ubuntu-restricted-extras
- Done.
- Though installing the restricted extras package will solve most of your problems, you may not be able to play dual layer dvds yet in your Ubuntu. Most commercial DVDs are encrypted with CSS (the Content Scrambling System), which attempts to restrict the software that can play a DVD.
- For that, you need to install libdvdcss2 package from medibuntu repositories. Simply copy-paste the following commands into Terminal.
sudo wget --output-document=/etc/apt/sources.list.d/medibuntu.list http://www.medibuntu.org/sources.list.d/$(lsb_release -cs).list && sudo apt-get --quiet update && sudo apt-get --yes --quiet --allow-unauthenticated install medibuntu-keyring && sudo apt-get --quiet update
sudo apt-get install libdvdcss2
- Let the process complete, might take some time.
- Additional Drivers is not a standalone application anymore. In its latest avatar, Additional Drivers functionality sits in a new tab inside Software Sources.
- In my case, all the hardware drivers including graphics, sound and wireless drivers were enabled automatically (though, as you can see, I still have a proprietary wireless driver on offer, which I have not activated). But this may not be the case for everyone.
- If you are among the not-so-lucky, open Unity dash (Ubuntu 12.10 Keyboard Shortcut: Super key) and search for 'Software Sources' application.
- Check for additional drivers available and activate the ones you want. In 90% of the cases, this will do the trick. Those who were not able to get their hardware drivers enabled yet will have to do a fair amount of digging through ubuntuforums.
Enable 'Show Remaining Space Left' Option in Nautilus File Browser
- Status bar towards the bottom of the Nautilus window shows not only the amount of free space left in the drive but also the number of items in that particular drive/folder. This is a simple yet very useful feature. Do the following to enable it.
- Open Nautilus file browser. Go to View - Statusbar. Enable it and you're done.
Preload can Speed up your Ubuntu to an Extent
- Preload monitors applications that users run, and by analyzing this data, predicts what applications users might run, and fetches those binaries and their dependencies into memory for faster startup times.
- You will notice a significant improvement in application loading time after installing Preload. You wont notice any speed difference if you are running new applications for the first time though. Preload is adaptive.
- Preload package is available in default Ubuntu 12.10 repositories.
- CLICK HERE to install Preload in Ubuntu OR search for it in Ubuntu Software Center.
- Done. Preload will run silently in the background. Warning: You might notice an increase in boot time as a result. Simply remove Preload if that is bothering you.
Apt-Fast Accelerates your Apt Download Speeds
- This one is for those among you who likes to mess around with command line tools.
- Apt-fast is a simple command line utility that can make installation and upgrading of softwares in Ubuntu/Debian much faster. Apt-fast make use of Axel application which accelerates HTTP/FTP downloads by using multiple sources for one file.
- Simply do the following in Terminal to install Apt-fast.
sudo add-apt-repository ppa:apt-fast/stable
sudo apt-get update
sudo apt-get install apt-fast
- Afterwards, a prompt will open up asking you to choose between apt-get and aptitude. Again, another prompt pops up asking to to choose between Axel and Aria2c (download managers). Choose the ones you like and you're done (I prefer apt-get and axel).
- Now, simply replace apt-get in commands with apt-fast. Examples below:
sudo apt-fast install chromium-browser
sudo apt-fast upgrade
- Done. Enjoy your increased apt-get download speeds.
Install Open in Terminal Nautilus Extension
- This extension adds a very useful 'open in Terminal' option to Nautilus right click menu.
- CLICK HERE to install extension directly from Ubuntu Software Center.
- Log out and log back in to enable it (OR hit Alt + F2, type nautilus -q and press ENTER).
- And you're done.
- Useful CPU/Memory load indicator applet that will reside in your top panel.
sudo add-apt-repository ppa:indicator-multiload/stable-daily
sudo apt-get update
sudo apt-get install indicator-multiload
- Now, simply launch System Load Indicator from Unity Dash.
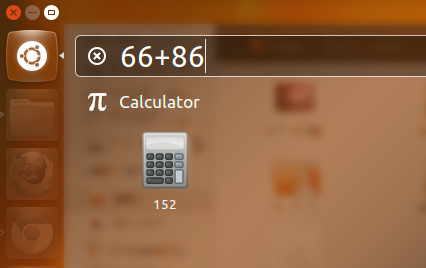
- Calculator Lens/Scope for Unity Dash. Do the following to install it in Ubuntu 12.10.
sudo add-apt-repository ppa:scopes-packagers/ppa
sudo apt-get update
sudo apt-get install unity-lens-utilities unity-scope-calculator
- Done. Log out and log back in (OR hit Alt + F2, type unity --replace and press Enter) .
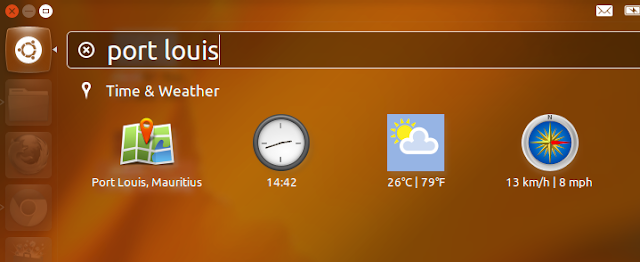
Unity Cities Lens/Scope for Ubuntu 12.10
- Unity Cities lens/scope for Ubuntu 12.10 is nifty. You just have to open up Dash and type in the city of your choice. It will show you the map, time, temperature and even the wind-speed right in your Unity Dash.
- And it is available in the same PPA as above (Calculator Lens). So if you have already installed Calculator Lens from scopes-packagers PPA, all you need to do is this:
sudo apt-get install unity-scope-cities
- Done. Log out and log back in.
- If you are a movie buff like me, this one is for you. This particular Unity Lens allows you to search for movie reviews directly from Unity Dash.
- Only if this Lens/Scope could show data from IMDB.com as well.
- Again, it is available in the same PPA as above (Calculator Lens). So if you have already installed Calculator Lens from scopes-packagers PPA, do the following in Terminal (otherwise, you have to run the first two commands as above).
sudo apt-get install unity-scope-rottentomatoes
- Done. More Unity Lenses/Scopes can be found here.
- No need for third-party apps to do very basic stuff like changing Launcher icon size, behavior etc. You can now do all of that directly from Appearance window.
- Right click on the desktop, select Change Desktop Background and Appearance window will pop up. You know what to do (see screenshot above).
- Quake is a popular first person shooter game and design inspiration for Guake Terminal Emulator came from consoles in computer games such as Quake which slide down from the top of the screen when a key is pressed, and slide back up when the key is pressed again. Guake is originally inspired from KDE's Yakuake.
- Bottom line is, if you use Terminal often, you'll love Guake.
- CLICK HERE to install Guake OR search for it in USC.
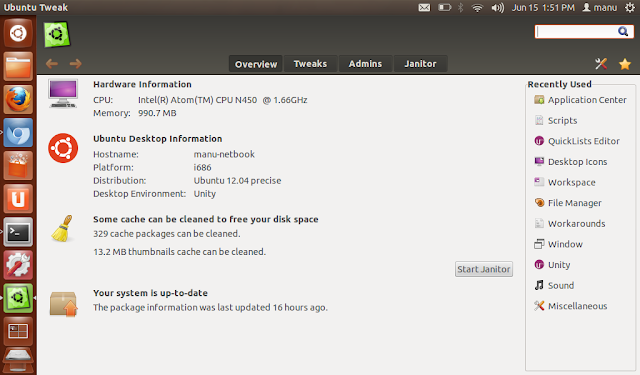
- Ubuntu Tweak is undoubtedly the most comprehensive tweaking tool for Ubuntu.
- Apart from the usual Unity related tweaks, Ubuntu Tweak has a number of other options like a fully functioning Software Center, huge array of scripts to choose from, Computer Janitor to free up space etc. to name a few.
- Do the following in Terminal to install Ubuntu Tweak.
sudo add-apt-repository ppa:tualatrix/ppa
sudo apt-get update
sudo apt-get install ubuntu-tweak
- Done.
- This is one of my favorite features which can be enabled/modified easily using Ubuntu Tweak. What it does is, you can set each corner of your workspace to do different tasks (which you can choose) on mouse hover action.
- Launch Ubuntu Tweak. Goto Tweaks - Workspace.
- With all its bling-bling, Ubuntu Software Center is not a finished product yet. It is still very slow to respond, crashes every now and then and cannot match the functionality aspects of Synaptic Package Manager.
- CLICK HERE to install Synaptic Package Manager from Ubuntu Software Center.
Install Google Voice and Video Chat Plugin for Linux
- I'm quite an heavy user of Gmail and use its video and voice chat features very often. Fortunately, Google video chat plugin is available for Linux along with Windows n' Mac.
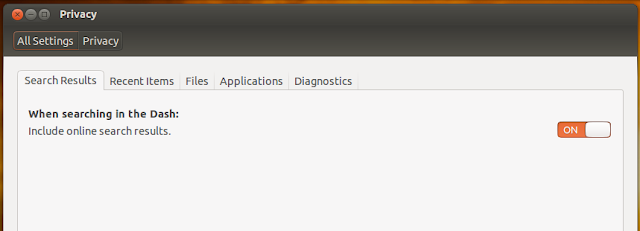
- One of the things that bugs me most is the slow loading Unity Dash. I see no point in having search results from Amazon and Ubuntu One Music Store appearing in Dash.
- Launch the Privacy app set online search results to OFF.
- But there is a downside to this. Some of the Scopes we discussed above like Rotten Tomatoes and Unity Cities will also be disabled. Choose wisely.
Recommended Read: 15 Hot Apps from Ubuntu App Showdown Contest (Some of my favorites include Lightread RSS reader and Nitro Tasks).


